
When Should You Stain a New Cedar Fence in Oklahoma City?
When Should You Stain a New Cedar Fence in Oklahoma City?
Your new cedar fence just went up, and it looks great. The next question is timing: stain it this weekend, wait a few weeks, or pencil it in for next spring?
The honest answer isn't a date. It's the wood itself.
Cedar needs to be dry enough to accept stain, and the surface needs to be clean before anyone picks up a sprayer. That sounds straightforward, but Oklahoma weather doesn't cooperate on a schedule. A run of hot, dry days behaves nothing like a soggy week, and boards on one fence can be ready well before boards on the fence next door.
Here's what actually matters before staining a new cedar fence.
Why stain cedar in the first place?
Western red cedar doesn't need help to look good. Left alone, though, sun and weather will slowly shift its color toward silver-gray. If you love that fresh, warm tone your fence has right now, staining is how you hold onto it.
A good exterior stain also gives the wood some protection from moisture and UV exposure. What it won't do is make the fence maintenance-free forever, and it definitely won't rescue a fence with weak posts or sloppy construction. Staining is aftercare — it works because the fence underneath was built right.
Plenty of homeowners skip staining altogether and let the cedar go silver naturally. That's a perfectly reasonable choice too, as long as you're making it on purpose rather than by accident.
So how long should you actually wait?
There's no universal number of days. Someone will tell you to stain immediately. Someone else swears by a six-month wait. Both of them are skipping the real question: is this wood, on this fence, ready for the stain you're planning to use?
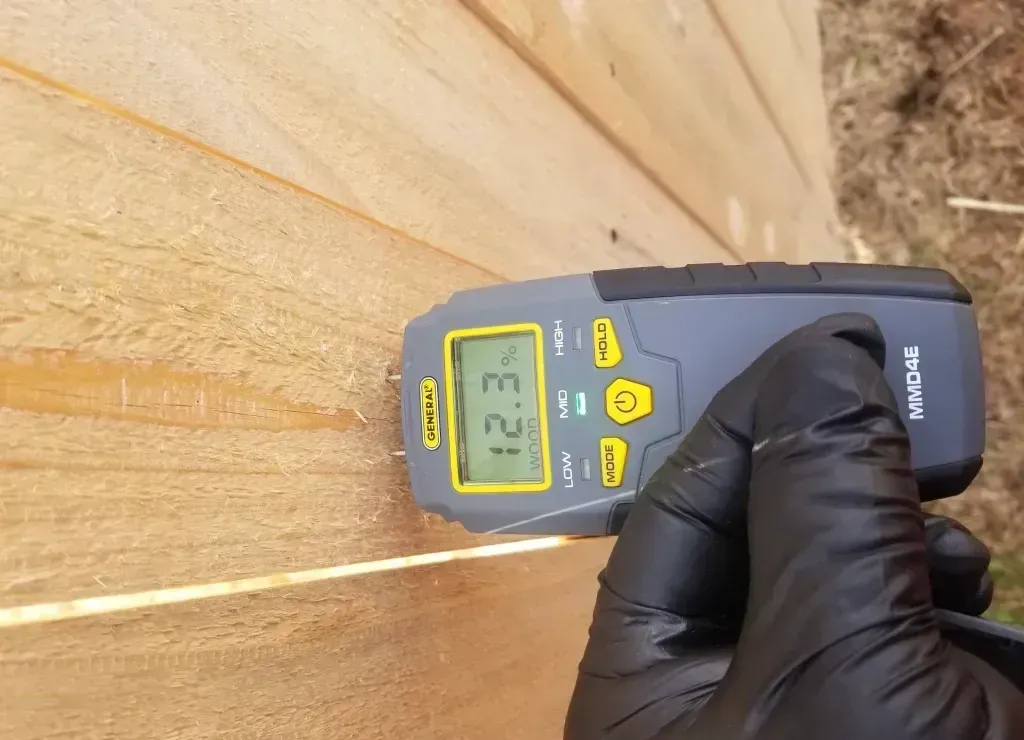
We use and recommend Wood Defender and Expert Stain and Seal on every cedar fence we install, and both are clear on this point: new cedar is typically ready to stain within a couple of weeks, but only once the boards hit the moisture and cleanliness requirements the product calls for — including moisture content under 13 percent. That's the standard we follow, not a rule of thumb passed around the neighborhood.
If the boards still feel damp, give them more time. If it rained last night, let the fence dry out again before anyone starts spraying. Calendars are good for planning around; the condition of the wood is what actually decides the day.
Lowes and Home Depot also carry a moisture meter for around $30 that is great for accuracy.
How do you know it's ready?
Three checks cover most of it.
Look at the boards.Are they clean, or is there dirt, mud, or overspray left over from installation? Stain has to reach bare wood to do its job, so anything sitting on the surface needs to come off first.
Check the moisture. A moisture meter beats guesswork every time. Compare the reading against what your stain's instructions call for, rather than estimating based on how many days it's been since installation.
Check the forecast. Line up a dry stretch before and after the application, following whatever window the manufacturer recommends. Staining damp boards because it's the only free Saturday on your calendar usually costs you more time later than it saves now.
You may also hear about splashing a few drops of water on a board to see if they soak in. It's a decent quick gut-check on whether the surface is even accepting moisture, but it's not a substitute for the product's actual instructions or a real moisture reading when one's called for.
What about staining both sides?
If you've got access and permission to work both sides of the fence, it's worth bringing up before the crew starts. A privacy fence has more exposed surface than just the boards facing your patio — think edges, rails, and everything else catching weather from both directions. Doing the job right takes more coordination than just making your view look nice.
Shared fence lines add another layer. Talk to your neighbor before anyone steps into their yard, moves their belongings, or applies stain on their side of the line. That conversation is a lot easier to have before the workday than during it.
If only your side is getting stained, ask exactly which surfaces are included in the quote. That way there's no surprise about what the finished fence looks like from each yard.
Picking a stain color
This really comes down to how much of cedar's natural grain you want visible once the job's done.
A transparent or lightly tinted stain lets more of the wood's character show through. Something darker or heavily pigmented changes the look more dramatically. Keep in mind that stain samples can behave differently on your actual fence than they do on a paint chip or a neighbor's fence, especially if the boards aren't all the same age.
Trying to match an existing fence? Track down the exact product and color if you can, then test it on a section that won't stand out if it's slightly off. "Cedar" on a bucket label is just a name — it's not a guarantee it'll match every cedar fence out there.
It's also worth asking what upkeep looks like down the road. No stain holds its exact look forever, and the sunny side of an Oklahoma City yard tends to weather faster than a shaded side. Plan on checking the fence periodically rather than locking in a fixed restain date years in advance.
Our take on a brand-new fence
When we install a wood fence, the goal is for you to love it years from now — not just on installation day. Quality materials, properly set posts, and solid gates are where that starts. Staining is simply how you take care of the cedar once the fence itself is built to last.
If staining is part of your plan, start thinking about it early. But let the wood's condition and the stain's own instructions pick the actual day — not the other way around. If the boards need more time, that time is worth giving them.
Have a cedar fence in the Oklahoma City metro and want to talk through staining it?
Send Legacy Fence & Construction a few photos and let us know when it went in. We'll help you figure out what to check next.